Public Liability Insurance.

Simply Business

Simply Business

Public Liability : £1,000,000

View our policy details


Sunday 16 December 2012

Chainsaw work.


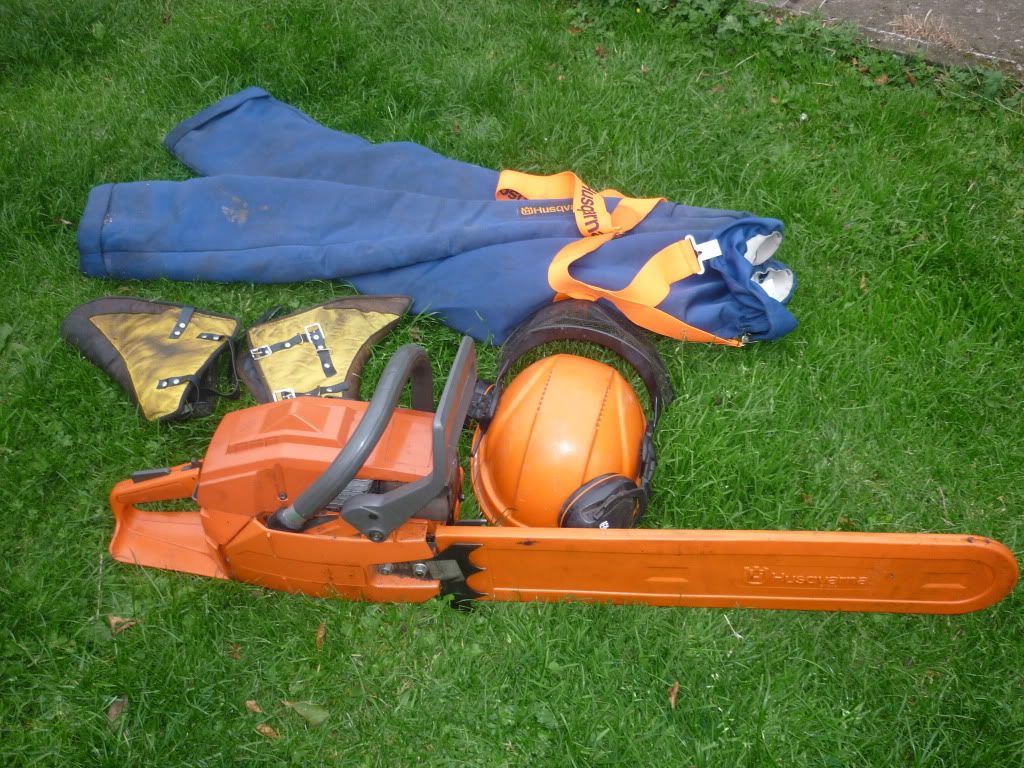
I'm also quite handy with a chainsaw and very well equipped to deal with just about any situation. If you have a tree down and need it moved smartish, road blocked etc just give me a shout on the mobile 07842192915 and I'll try to get there within a couple of hours. I'll either get rid of it for you or process it into firewood.
I'll dice it and slice it up into whatever lengths you require and even split it into burning sized bits for you.


Best method for slicing up a fallen tree is to cut 3/4 of the way through and only all the way when you are confident that you won't hit the dirt or jam the saw. Then roll it and cut the last quarter. This was a 70ft ash.


This was just a branch from the huge beech to right of centre but there was a good 3-4 tonnes in it. had to work through it very carefully because there were lots of jam and roll risks.


Building a deck.

Not the easiest thing to build, lots of digging involved.
Three trenches for this one, and a post every 800mm for stability. I've walked on a few decks and the one thing they all seem to have in common is movement. To avoid this you need lots of support.

Once the posts are in you need some strong cross members.
To prevent ponding you need just a slight slope both ways to run the water off the boards and the joists. Galvanised bolts and nuts secure the joist to the post.
The hammers are for positioning the boards, not for hammering nails. Everything on this deck is bolted or screwed.
 

Thursday 13 December 2012

Building a 12" x 10" shed.

I worked with my son Andy on this one. He wanted a shed/workshop of this size but buying one ready made was four figures so we decided to do it ourselves. This was a major pick and shovel job to start with as the previous occupants had used the area at the end of the garage as a dumping ground for earth, rocks, slabs etc. This had to be removed using wheelbarrow and trailer. Once the area was cleared we built a shutter and organised concrete to be delivered. We used a small firm called Spotmix these guys were brilliant and could barrow or pump from the street to where you wants it that's
 Spotmix  Sean Mc Skimming 07957450240
We filled the shutter and smoothed it off and gave it a few days to harden. Next came the sides and so on.We then built the floor using 3x2 and 3/4 ply and set that in place, followed by front, back, roof etc.
Good solid shed...


Building a Gravel path using Balmullo chips.

Wish I'd taken more pics of this job just to let you nice folks know how much goes into doing a gravel path. The lad had a few dozen terra cotta pavers spare so I dug a channel about 1 mtr from the garage. I filled the channel with a sloppy mix of concrete over a weedproof membrane  and laid the blocks on this. It's a good way to hold the membrane in place, I hate to see gardens where the membrane has found it's way to the surface due to bad workmanship.
Reckon I probably dug out about three tonnes of earth and rubble to do this one. There was no way of getting a machine in so it had to go by hand, into my trailer by wheelbarrow, then taken to the recycling centre and removed using a shovel. Cost a few hundred pounds including materials.

Exterior painting.


This was another young couple who had bought a nice big house with a well looked after garden but just did not have the time to look after it in the way that the previous owners had. The garden wall needed a couple of coats of masonry paint, and the wooden fence on top of the wall needed a couple of coats of preservative. I went on to do a few more jobs for these nice folks.

Replacing an old worn out steel fence with a nice new wooden one.

These nice folks were about to put their house on the market but thought that this would be difficult due to the state of the drive and railings.

Not a pretty sight so it's coming down and being replaced with some timber.
Old railings removed and new posts concreted into place.


All screwed together by the way, I rarely use nails these days, screws make for a far better job.

Another gate and a small ranch style fence.


This was a job for a nice young couple who had bought a house with a nice garden but didn't really have time to look after it properly because of work commitments and the arrival of youngsters. The existing fence and gate had rotted away and now their garden was being used as a thoroughfare by local neds.


Repairing an outhouse roof.


This was nasty to say the least. The joists had rotted away so badly that the roof was sagging and the owner was scared to go into his shed for fear that the roof would fall on him.


I carefully removed the slates, sarking and rotten timbers.

I was quite lucky here because although the joists were well rotted they were still intact, so I was able to copy them and fix them into place in a very short time.

 
With the frame in place I'm now able to get stuck in and attach the new sarking.

The sarking is attached and my work here is almost finished. My son is a roofer and has agreed to felt and reslate the roof. I'll add a pic of the finished roof later.

Now to the front of the shed. The owner had been using it for storage of garden tools etc for years without a door, and asked me if I would do this as well seeing as I was there.
As you can see I've put a frame in the gap, adding strength to the roof at the same time.

He now has a very useable outbuilding thats watertight and safe, and cost under £300 for my part + what he paid for the slating.

Laying a reclaimed oak floor.


This job was way up north in Inverness. The lad had purchased a quantity of oak tongue and groove flooring from someone in Dundee and asked me to collect it, deliver, and fit it.
Although I had done laminate flooring before to quite a high standard this would be quite different because I didn't know for sure what it was to be fixed to, and also the condition of the oak was questionable to say the least. Laminate flooring is manufactued to exacting standards so is always straight and clicks perfectly together for the most part. Not quite the same with old, used oak flooring that's been down for years, and subject to damp, temperature fluctuations, wear and tear etc.
The normal way of fitting hardwood flooring to existing floorboards is to use hidden screws through the tongue at an angle however it turned out that the floor in question was concrete. First thing I did was removed all of the skirting boards, carpets and underlay. After thoroughly cleaning the floor I applied a coat of Thomson's Water seal to prevent moisture from seeping out of the concrete and warping the oak boards. Starting from the longest wall and working across the room I used a special adhesive to fix the boards to the concrete floor. There were a good selection of boards from aprox 8' all the way down to 1' so I made sure to have as many different sizes in each row as possible for a random effect. Setbacks were that some of the boards had warped with age so lots of pushing and shoving to get them lined up. Glueing onto concrete you dont have the luxury of being able to bend a board into shape and fire a screw in, you have to hold it until the glue sets.
Anyway, by the time I reached the opposite wall I had a defecit of two millimetres so have to give myself a pat on the back for that one. The lad said he would send a pic once the furniture was back in and the floor polished but no sign of that yet, but I'll add it when it arrives.

Building a gate.

I was asked recently to build and install a garden gate to close off a path and give the occupant a bit of security as drunk people on the way home from partying would urinate or worse in her back garden.

It's not quite finished at this stage as I had to paint it and trim the post. It's done but no pic as I didn't have my camera that day. This job cost under £120 inc materials.

Boxing in pipes.

Hi folks, this is my first post, and I'm going to show you some of the jobs I have been doing this year for family and friends, and friends of friends. This was the window wall of a kitchen belonging to a lass in Broughty Ferry. There were a bunch of pipes and cables protruding from the ceiling and left hand wall and she wanted them concealed. First thing I did was build a frame from 50mm x 50mm timber, then cut a sheet of plasterboard which I attached with screws so that if any of the pipes ever required attention it could be easily removed. We decided to incorporate a shelf into the design so she could have some ornaments and girlie stuff up there. I think it worked out ok, and it cost less than £200 including materials.